In the Overview menu of the Mailings module you can schedule mailings and view mailing reports.
Getting started
When you are in the overview window, move your cursor across the window. You will see round symbols with an arrow icon light up that will allow you to open the editing menus. Conversely, you can right-click to open them.
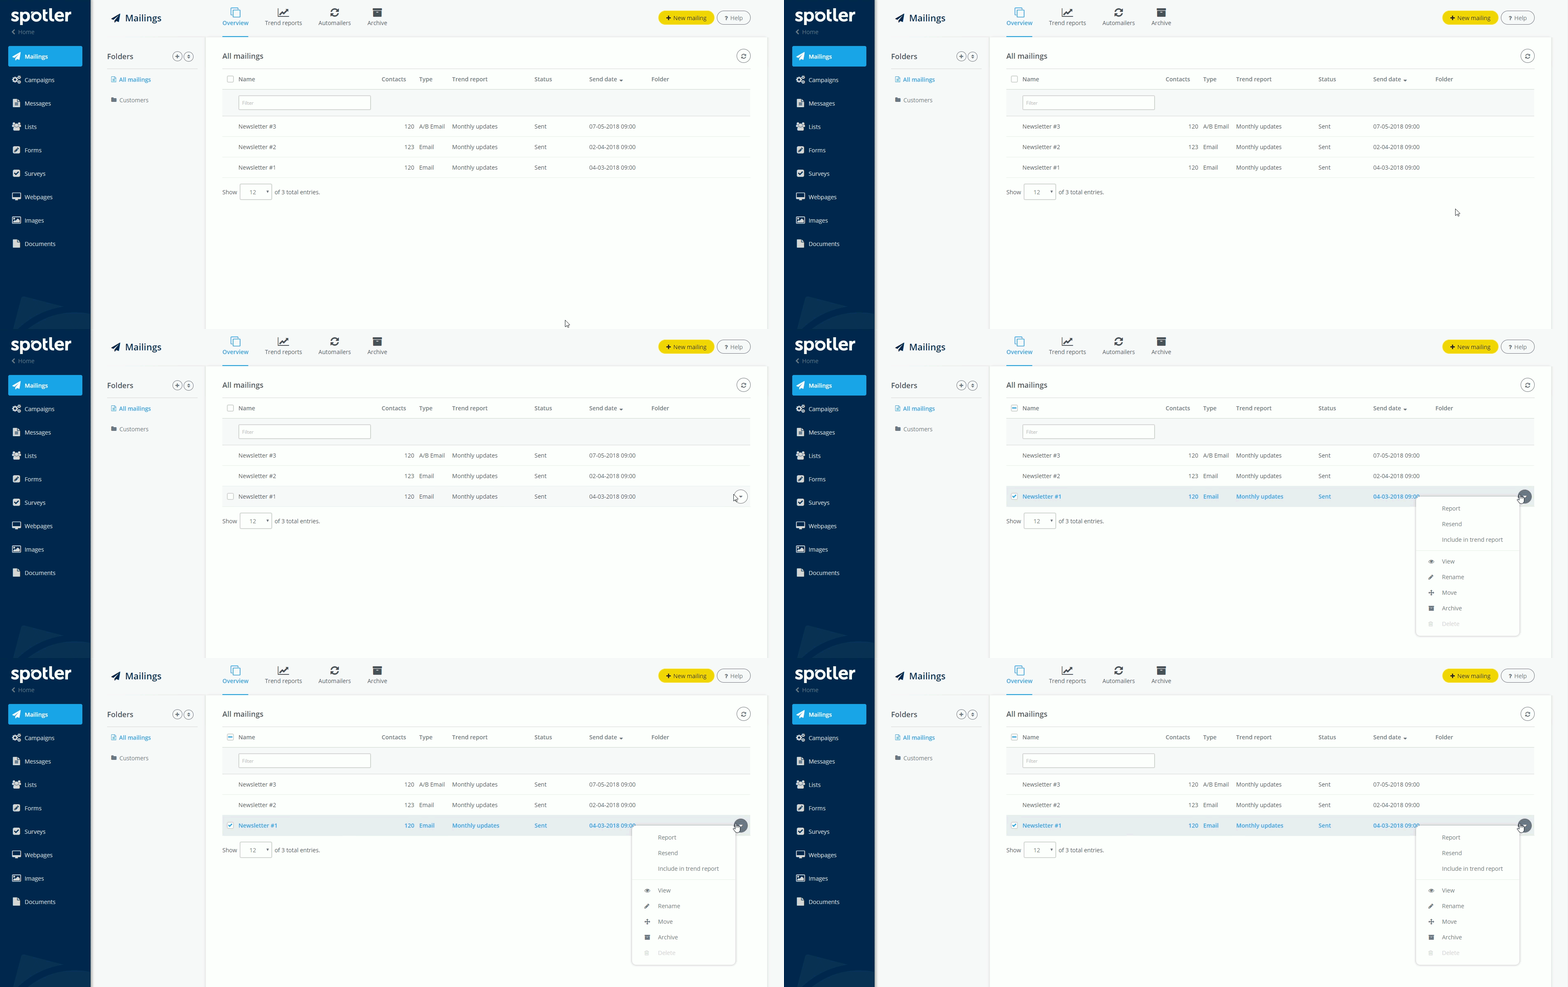
From this screen, you can:
Manage and edit folders
Create new folders by clicking the plus icon next to Folders or rearrange folders by clicking on the double arrow icon. Would you like to edit existing folders? You can open the editing menu by clicking on the round icon. Would you like to know more about the possibilities of this editing menu? Please continue to Editing menus for folders and mailings.
Managing mailings
Manage mailings through the editing menu, which you can open by clicking on the round icon that lights up on the right side of your display. Would you like to know more about the possibilities of this editing menu? Please continue to Editing menus for folders and mailings.
Select and move multiple mailings
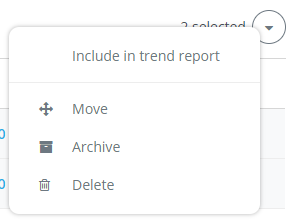
You can select multiple mailings by ticking the box in front of the name of the mailing. You will see a round symbol with an arrow icon light up in the upper-right corner, that will allow you to open the editing menu for moving mailings. Next to this button, you will see the number of selected mailings. When you click the button, you will see the following editing menu drop-down:
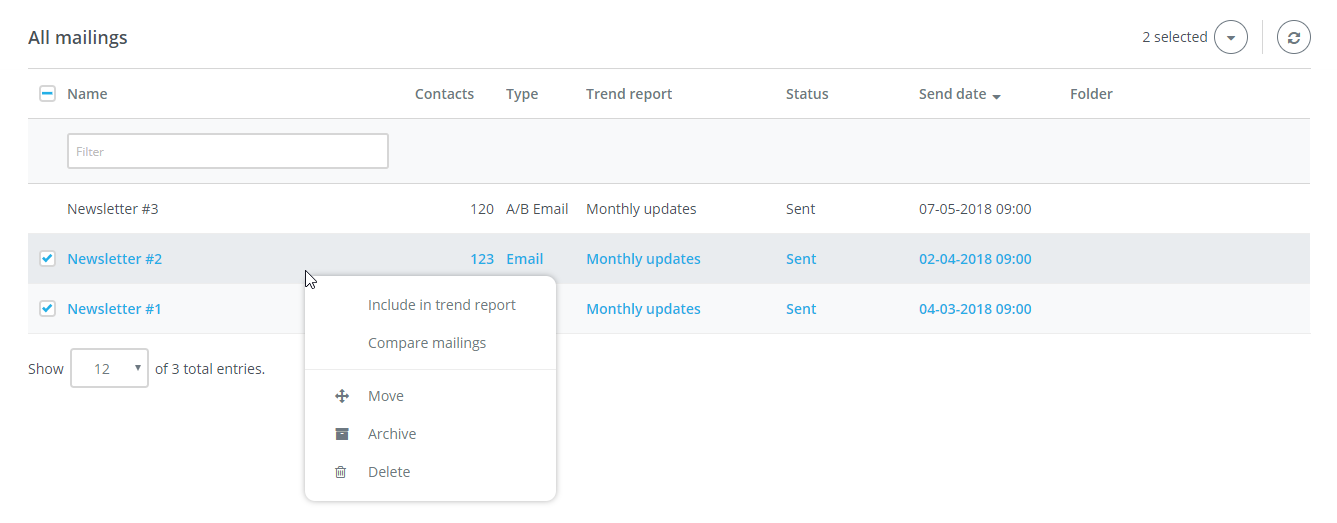
By using the Move function, you can move the selected mailings to one of the existing folders.
 |
Rearranging the columns Name, Contacts, Type, Send date Move your cursor across the titles of the columns in the Overview menu. You will see two arrows light up next to the Name, Contacts, Type and Send date columns. These allow you to alphabetize mailings, sort them by number of contacts, by Email or SMS, and by newest or oldest campaigns first. |
Editing menus for folders and mailings
In the Overview you can open the following three drop-down menus:
- The drop-down menu for folders, by clicking the round symbol with the highlighted arrow that appears when you hover your cursor over the folders.
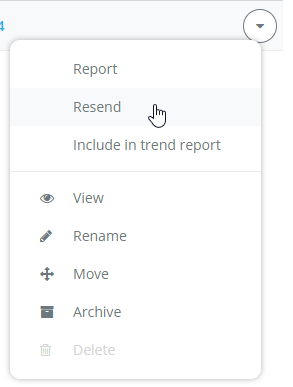
- The drop-down menu for mailings by clicking the round symbol with the arrow that lights up when you hover your mouse cursor over your mailings.
- The drop-down menu for mailings can also be found in the upper right-hand corner of your screen when you select the checkboxes of multiple mailings.
The menus look like this:
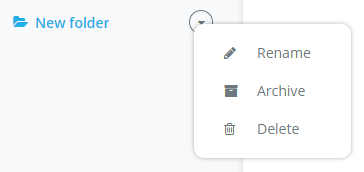
Explanation of the functions in the Folder editing menu:
| Rename | Change the name of your mailing folder. |
| Archive | Move your mailing folder to Archive. |
| Delete | Delete your mailing folder. |
Explanation of the functions in the Mailing editing menu:
| Reports | Open the reports of your mailing. Do you need help? Please continue to Mailing reports. |
| Resend | You have sent a mailing and you would like to resent it afterwards to a contact? This is possible by using the function Resend. You can find this function behind the relevant mailing. A pop-up will appear with two options:
|
| Add to trend report | Link your message to a trend report. Would you like to know more about Trend reports? Please continue to Trend reports. |
| View | Open the View mailing window. You can now see how your mailing will be displayed on a desktop, a smartphone and a tablet. |
| Rename | Change the name of your mailing. |
| Move | Move your mailing to a mailing folder. |
| Archive | Move your mailings to the Archive. |
| Delete | Delete your mailing. |