Not every website visitor is a lead. This is how customers or, for example, competitors also visit your website. To maintain an overview, you will find various tabs in the Leads module. If you assign a label to a visitor, they will automatically end up in the tab of the same name. There are two options for assigning labels to companies and contacts: manually and via a bulk import of domain names.
The available labels are:
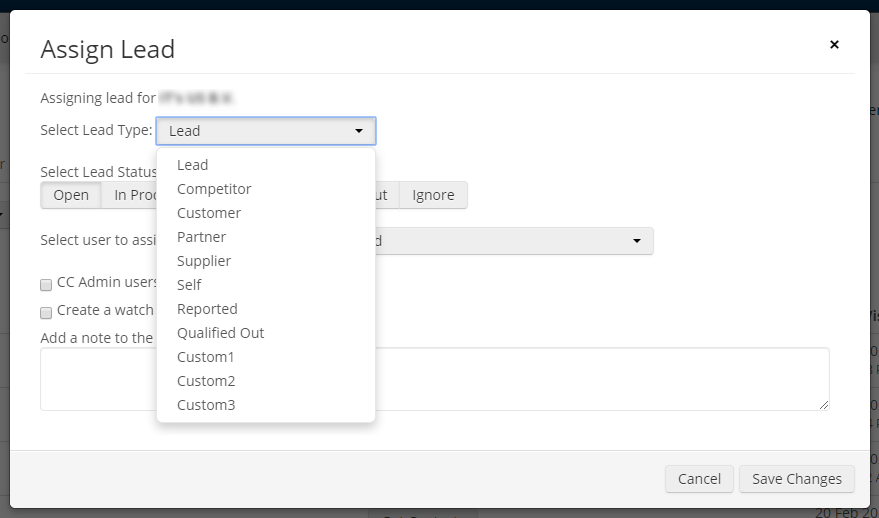
- Lead: a potential customer
- Competitor: your competitors
- Customer: your existing customers
- Partner: companies you work with
- Supplier: companies of which you are a customer
- Self: colleagues
- Reported: this means that you want to have the lead removed from your Leads module, because you are convinced that the lead is not linked to the right company. Spotler will then automatically receive a notification to investigate this.
- Qualified out: other visitors you do not want to track
It is also possible to add custom labels.
Label manually
The organization in the example below is an existing customer, so we will move it from the lead overview to the Customer tab.

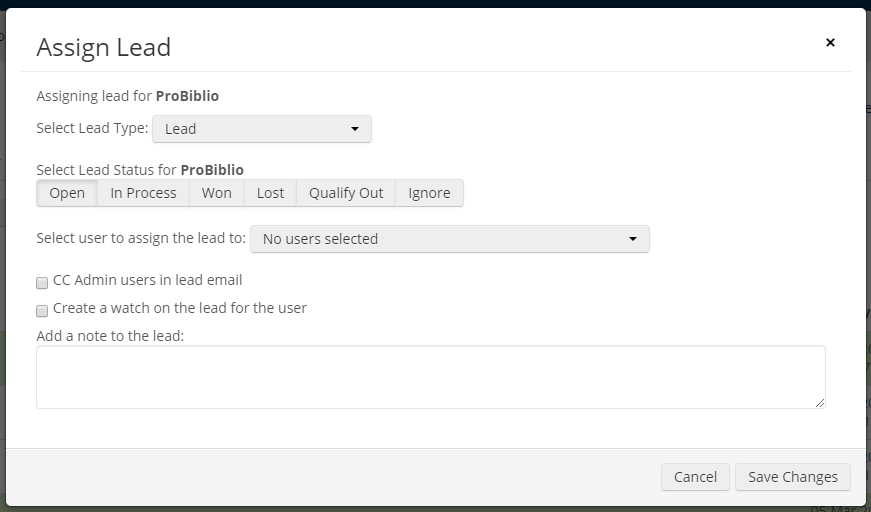
To do this, first click on Assign Lead.

Then a pop-up screen opens. At Select Lead Type, click on Lead to open the drop-down menu with various options:

In this case, we choose Customer from all options:

If you have saved the adjustment, this company will return to Customer from now on. Click on the Customer tab in the menu and you will get an overview of all the customers you have labeled including their behavior and visits.
Upload and bulk label domains/URLs
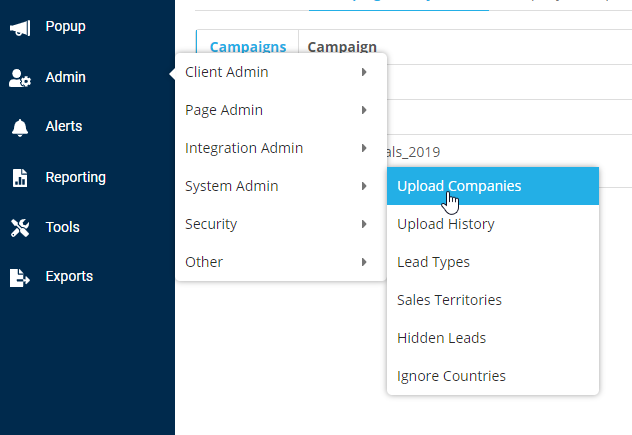
There is also an option to import a group of companies under the same label at once. For example, giving all your customers the Customer label at once. To do this, go to Admin -> System Admin -> Upload Companies in the main menu.

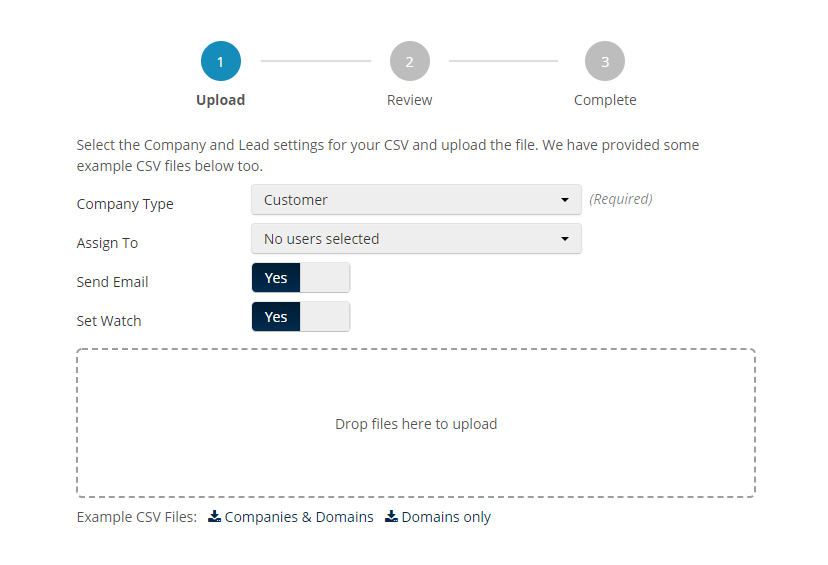
You will then be asked which type of label/qualification you want to upload, e.g. Customer, Competitor or Partner. Choose whether you want to assign this to a user, so that he or she can take specific action to follow up. You then have the option to set up notification emails. This can be done on the basis of:
- Send email: when companies in your upload reach 4 chilis
- Set watch: as soon as the company visits your website you will receive a notification. You can read more information in the article Alerts and reports.
In addition to uploading, you will find sample files. You can use this as the basis for your own upload file. Put the correct information in the file and upload.
You do this in three steps:
- Step 1 - Upload: select what type of company you will upload, are they competitors, customers, partners, etc.? Then upload your CSV file. You can drag and drop the file or upload it from a location on your computer.

- Step 2 - Review: you see which companies have previously visited your website, which companies are in your database but have not yet visited your website and when there is no match yet in the database. In this step you can still adjust the above information for each company.
- Step 3 - Complete: you see a summary of the import.
The tab ISP
You will also find the ISP tab in the My Leads overview. The abbreviation ISP stands for Internet Service Provider. This tab contains contacts who end up on your website as a private individual. For example, if a visitor purchases an internet subscription from T-Mobile and ends up on your website via his private network.